Saturday, December 30, 2006
Tuesday, December 26, 2006
Monday, December 25, 2006
Friday, December 22, 2006
Wednesday, December 20, 2006
Tuesday, December 19, 2006
Monday, December 18, 2006
Sunday, December 17, 2006
Saturday, December 16, 2006
Chun Li
Friday, December 15, 2006
Thursday, December 14, 2006
Thursday, December 07, 2006
Saturday, December 02, 2006
Friday, December 01, 2006
sketchy wetchy
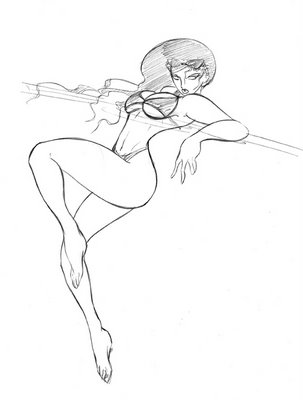
Finally got some time to draw something of my own. I wonder if I begin to suck more when I draw more sometimes, because I have to draw faster and neglect errors to get stuff done, and then I wonder if the habit carries over into the things I do care about.
Yeah I like drawing girls in this position. I never seem to get tired of it.
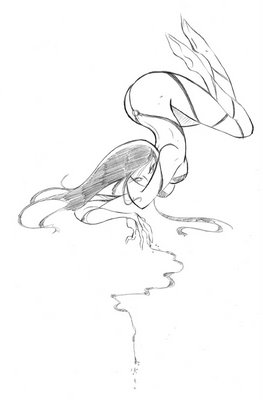
Gift wrapped or something.
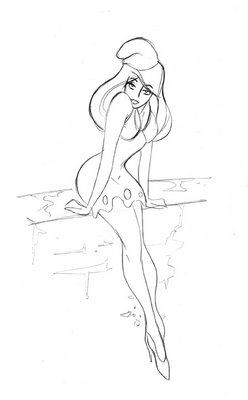
Was wondering what Smurfette would look like if I drew her in the way I draw girls. Then I checked google and discovered a whole bunch of people asked themselves the same question...
Yeah I like drawing girls in this position. I never seem to get tired of it.
Gift wrapped or something.
Was wondering what Smurfette would look like if I drew her in the way I draw girls. Then I checked google and discovered a whole bunch of people asked themselves the same question...
Saturday, November 18, 2006
Friday, November 17, 2006
Tuesday, November 14, 2006
Saturday, November 11, 2006
Wednesday, November 08, 2006
Friday, October 13, 2006
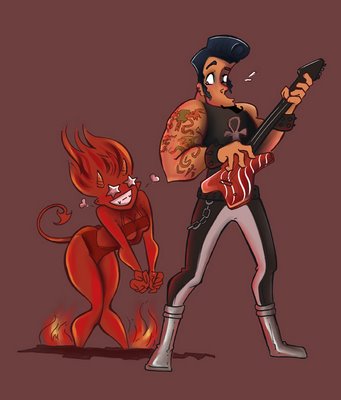
Fangirl from Hell
For Illustration Friday's 'Smitten' theme.
The first idea was to do a girl who was in love with a rockstar. Then my husband kept on playing his Guitar Hero 2 demo, so I kinda decided to turn the guy into the rocker that comes with the game. Then I thought it would be kinda funny if the girl was a devil, since you know they say metal rock is satanic and whatnot. Then I thought the title would be kinda neat. So here you have it.
Hand inked, line colored in Photoshop, paints in Painter.
Thursday, October 12, 2006
The day I drew a town...
Some time ago, I was contacted by the nice people at Robina Land Corporation to do an illustration for their new office, and a billboard somewhere in town. The illustration was to be of an imaginary cityscape, promoting the town, Robina, as a futuristic, high-tech but fun place.
Altogether, there were over 30 real and imaginary buildings, and over 60 additional elements (more actually, since a groupd of people was considered 1 element). The smaller image, at full size, was supposed to be 5mx2m. The billboard was 10mx4m.
I had done artwork for large format reproductions before, but they were not as big or complicated. From start to finish, the project took me about a month to complete. It was fun, very tiring, and I thought I'd share how I put the proejct together, in case anyone was interested.
So here goes:
Step 1: Concept
After receiving the brief, I mulled over the concept and played with some very rough layouts in my head. It was quite boggling to try and envision everything, so I simplified things to the bare minimum. My first take was that there was no way I could fit everything onto one plane, and I didn't want to deal with too many perspective issues later. So I suggested tiering the illustration, relying on varying depths to get everything into place.
Step 2: Initial sketch
Conceptualizing the layout was easy; getting it into a workable sketch was another matter. I toyed with the idea of drawing the whole thing straight into the computer in Painter, but the file was too large even at 72dpi to work quickly. So it quickly went back to good ol' paper.
I decided to do the sketch at 1/10 of the main image size (50x20cm). In retrospect, I could've done with a bigger ratio, but I didn't trust my math enough to go with a wierd number.
I drew in all the buildings first. For the exisiting ones, I referenced photos of the buildings. For the imaginary ones, I cooked them up with what basic architectural knowledge I had on hand, pus various other funky building references. When I sent the first sketch over to the client, I labelled the buildings to let them know which ones were which.
Step 3: Sketch refinement
The client liked the sketch in general, but there were some changes. We went through a couple of rounds of changes, which went by slower than I expected because I had to redraw things relatively carefully because of the scale. The changed items were draw on a seperate sheet of paper or tracing paper, and I recomposited the image in Photoshop.
Step 4: Elements
Once the buildings were approved, I got to work on the elements. There were a lot of them, and again it was hard to fit them in. What's more I realised that there was no way I could draw the elements on top of the scaled building sketch - they'd be the size of rice grains.
I contemplated blowing up the building sketch, but I found that in order to comfortably draw the elements, I would have to enlarge the building sketch a lot, making it very cumbersome to work with.
In the end I just decided to draw all the elements on seperate sheets of paper. I scanned these in individually and resized and placed them on top of the buildings.
It wasn't the most accurate solution, but fortunately it worked out in the end.
Step 5: Vectoring
I knew from the start that with the way I work, Illustrator would not be able to handle all the elements in one working file. I make use of a lot of gradients, lighting effects and clipping masks, and when you have literally hundreds of these in one file, the system just can't keep up.
So I divided the artwork into different parts. There were 8 different files just for the buildings, and another 6 files for the elements. In addition, I also created about 30 files for traced logos that I needed to use on the buildings.
Step 6: Making a MAMMOTH file
This worried me till the very end. I wasn't sure if the computer was up to the task of rendering such a large file. After several tests, I decided to create one master Illustrator file which had all the artwork in it, on different layers. I exported these layers one by one as hi-res EPS files.
I created a new Illustrator document and re-composited the image again, this time by importing the hi-res EPS files. This file I saved as an EPS as well, including the linked EPS files. The size of the final EPS file is something like 300mb.
However, I've always been kinda distrustful of linked EPS files, so I decided to create a hi-res TIFF of the file. In Photoshop I created a 1:2 scale file at 300dpi and placed all the hi-res EPS files. And waited and prayed that the computer would not hang.
Thankfully the investment in a new comp paid off and the file did eventually render out. The hi-res CMYK TIFF version of the file weighs in at a hefy 1G.
All in all, I supplied a CMYK EPS, a CMYK TIFF and an RGB TIFF file for both the wall mural and the billboard.
And there you have it, in a nutshell. The day I drew the town.
(Thanks to the kind folks at Robina Land Corporation for letting me talk about their project. )
Altogether, there were over 30 real and imaginary buildings, and over 60 additional elements (more actually, since a groupd of people was considered 1 element). The smaller image, at full size, was supposed to be 5mx2m. The billboard was 10mx4m.
I had done artwork for large format reproductions before, but they were not as big or complicated. From start to finish, the project took me about a month to complete. It was fun, very tiring, and I thought I'd share how I put the proejct together, in case anyone was interested.
So here goes:
Step 1: Concept
After receiving the brief, I mulled over the concept and played with some very rough layouts in my head. It was quite boggling to try and envision everything, so I simplified things to the bare minimum. My first take was that there was no way I could fit everything onto one plane, and I didn't want to deal with too many perspective issues later. So I suggested tiering the illustration, relying on varying depths to get everything into place.
Step 2: Initial sketch
Conceptualizing the layout was easy; getting it into a workable sketch was another matter. I toyed with the idea of drawing the whole thing straight into the computer in Painter, but the file was too large even at 72dpi to work quickly. So it quickly went back to good ol' paper.
I decided to do the sketch at 1/10 of the main image size (50x20cm). In retrospect, I could've done with a bigger ratio, but I didn't trust my math enough to go with a wierd number.
I drew in all the buildings first. For the exisiting ones, I referenced photos of the buildings. For the imaginary ones, I cooked them up with what basic architectural knowledge I had on hand, pus various other funky building references. When I sent the first sketch over to the client, I labelled the buildings to let them know which ones were which.
Step 3: Sketch refinement
The client liked the sketch in general, but there were some changes. We went through a couple of rounds of changes, which went by slower than I expected because I had to redraw things relatively carefully because of the scale. The changed items were draw on a seperate sheet of paper or tracing paper, and I recomposited the image in Photoshop.
Step 4: Elements
Once the buildings were approved, I got to work on the elements. There were a lot of them, and again it was hard to fit them in. What's more I realised that there was no way I could draw the elements on top of the scaled building sketch - they'd be the size of rice grains.
I contemplated blowing up the building sketch, but I found that in order to comfortably draw the elements, I would have to enlarge the building sketch a lot, making it very cumbersome to work with.
In the end I just decided to draw all the elements on seperate sheets of paper. I scanned these in individually and resized and placed them on top of the buildings.
It wasn't the most accurate solution, but fortunately it worked out in the end.
Step 5: Vectoring
I knew from the start that with the way I work, Illustrator would not be able to handle all the elements in one working file. I make use of a lot of gradients, lighting effects and clipping masks, and when you have literally hundreds of these in one file, the system just can't keep up.
So I divided the artwork into different parts. There were 8 different files just for the buildings, and another 6 files for the elements. In addition, I also created about 30 files for traced logos that I needed to use on the buildings.
Step 6: Making a MAMMOTH file
This worried me till the very end. I wasn't sure if the computer was up to the task of rendering such a large file. After several tests, I decided to create one master Illustrator file which had all the artwork in it, on different layers. I exported these layers one by one as hi-res EPS files.
I created a new Illustrator document and re-composited the image again, this time by importing the hi-res EPS files. This file I saved as an EPS as well, including the linked EPS files. The size of the final EPS file is something like 300mb.
However, I've always been kinda distrustful of linked EPS files, so I decided to create a hi-res TIFF of the file. In Photoshop I created a 1:2 scale file at 300dpi and placed all the hi-res EPS files. And waited and prayed that the computer would not hang.
Thankfully the investment in a new comp paid off and the file did eventually render out. The hi-res CMYK TIFF version of the file weighs in at a hefy 1G.
All in all, I supplied a CMYK EPS, a CMYK TIFF and an RGB TIFF file for both the wall mural and the billboard.
And there you have it, in a nutshell. The day I drew the town.
(Thanks to the kind folks at Robina Land Corporation for letting me talk about their project. )
Wednesday, October 11, 2006
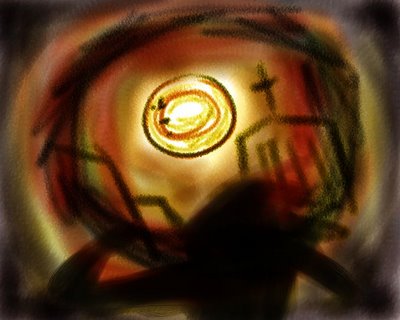
Scary dream
I had a dream last night and I just wanted to get the jist of it down. Bad artwork I know, too tired to do something nice.
I don't know what the dream was about exactly, all I do remember was at some point I was with a large group of people and we looked up at the sky and the sun turned red or black or red-black. It had these black dots in it and the sky turned dark. I know I was near a church that I used to go to when I was a kid. I was trying really hard to hail a cab and I got one and I made my mum get in it and told it to go to my grandma's house. For whatever reason I decided to walk. Except I couldn't really walk, the ground was slippery or something, and I had to grab on to stuff and pull myself along. It's the oddest feeling, as though the world were suddenly vertical instead of horizontal, and you had to cimb to get anywhere. Needless to say it was slow going, what with the additional rain and wind and black sky, red sun and people rushing about trying to get to church or something.
That's all I remember from it. I don't like dreaming of black suns... I sometimes do, but those dreams are never pleasent.
Tuesday, October 10, 2006
Sunday, October 08, 2006
Subscribe to:
Posts (Atom)